
Key Takeaways
- Assess footing and drainage before selecting jump equipment.
- Leave room for approaches, landings, turns, warm-up work, and safe exits.
- Choose adjustable equipment that serves multiple training purposes.
- Match fence height, width, appearance, and placement to the horse and rider.
- Inspect poles, standards, cups, hardware, and footing before every session.
- Budget for maintenance, storage, delivery, and replacement parts, as well as initial purchases.
A useful horse jump area begins with a plan, not a crowded collection of obstacles. Before purchasing equipment, consider the horses, riders, arena dimensions, footing, and type of work the space must support. When comparing core components, riders can buy round horse jump poles through Old Dominion Horse Jump Company, a Washington, Virginia-based builder of wooden horse-jump equipment. Its pricing page covers round poles, standards, planks, gates, walls, cavalletti, jump cups, and related pieces, providing farms in Virginia and beyond with a practical reference for budgeting a wood-jump setup.
The strongest arrangement is not necessarily the biggest one. A modest inventory of sound, adjustable equipment can create countless exercises when it is placed thoughtfully. The goal is to give horse and rider clear questions, adequate space to answer them, and a safe surface throughout the ride.
Start With the Arena’s Job
First, decide what the arena needs to do on an ordinary day. A private ring used by one experienced rider can be arranged differently from a lesson arena, a busy boarding barn, or a facility that hosts clinics. Think about whether the area must accommodate flatwork, pole exercises, gymnastics, individual schooling, or full courses. Also consider whether jumps will remain in place for several days or be moved frequently.
Mark the usable riding area rather than relying on the arena’s outside dimensions. Gates, corners, irrigation equipment, seating, and storage may reduce the space available for safe lines. A practical layout keeps a clear warm-up zone and avoids placing fences where a rider must make an abrupt turn after landing.
Check the Footing Before Adding Jumps
Footing is the foundation of every jumping session. The University of Kentucky’s overview of riding arena footing explains that arena performance depends on factors including construction, surface materials, drainage, intended use, and maintenance. A beautiful fence cannot compensate for a surface that is uneven, slippery, excessively deep, or hard underfoot.
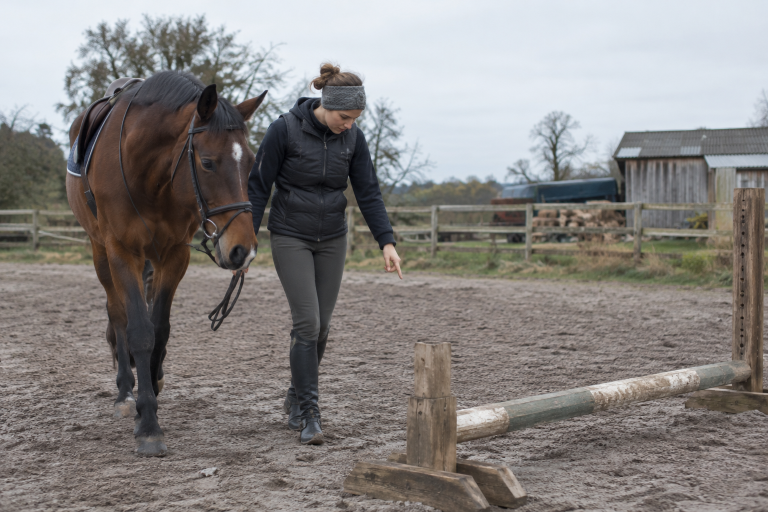
Walk the arena before riding and look for holes, ruts, loose edges, hard patches, standing water, or areas that feel noticeably different from the rest of the ring. Pay special attention to takeoff and landing zones, which receive repeated traffic. Dragging, watering, grading, and repair schedules should be tailored to the surface and local weather conditions. If a footing problem persists, seek advice from an arena professional or qualified equine adviser before increasing the intensity of jumping work.
Build a Flexible Basic Inventory
A versatile jump collection starts with equipment that can be reused in different ways. Standards and jump cups provide adjustable height options. Poles can serve as ground lines, trot poles, canter poles, rails, or parts of a grid. A few planks, gates, boxes, or low fillers add visual variety without requiring every fence to be large or complicated.
- Standards: Choose stable pairs that sit level and work with compatible cups.
- Poles: Keep several in good condition for flatwork and jumping exercises.
- Jump cups: Use cups that fit the standards properly and release as intended.
- Fillers: Introduce gates, boxes, walls, or brushes gradually to develop confidence.
- Cavaletti: Use adjustable low obstacles for rhythm, coordination, and introductory work.
Prioritize versatility over novelty. One set of poles and standards can support a crossrail, vertical placing pole, bounce, low oxer, or simple course line. This approach saves space and makes it easier to change exercises as training needs develop.
Lay Out Each Schooling Session Step by Step
- Walk the arena and identify the actual riding space.
- Reserve an uncluttered area for warm-up and flatwork.
- Set one simple vertical fence and one low, spread fence, with generous room around each.
- Add ground poles only where they improve the exercise and remain easy to see.
- Ride the proposed routes at the walk, trot, and canter before raising fences.
- Evaluate whether the horse has room to land, rebalance, and make the next turn.
- Move or simplify any obstacle that produces a rushed, crooked, or awkward approach.
Course flow matters more than decoration. A fence may look attractive from outside the ring but still be poorly placed if it leaves no room for a balanced departure or landing. Keep lines straightforward, especially when schooling green horses, novice riders, or unfamiliar combinations.
Match the Question to Horse and Rider
Jump height is only one part of the difficulty. Width, color, filler, ground lines, approach, and surrounding space all affect how an obstacle rides. Build confidence in stages. Begin with poles on the ground, then use low crossrails to encourage a centered approach. Add small verticals when rhythm and steering are dependable, then introduce spreads and visual elements one at a time.
A lower fence ridden quietly and accurately is more valuable than a larger fence approached without balance. If a horse rushes, loses straightness, hesitates, or lands disorganized, reduce the question and review the approach. Progress should reflect a consistent understanding rather than a need to reach a particular height quickly.
Make Safety Checks Part of the Routine
Before every ride, inspect standards for stability, poles for cracks or splinters, cups for secure fit, and hardware for sharp edges or looseness. Rutgers Cooperative Extension recommends that arenas and jump courses have suitable footing and well-maintained equipment, including jump cups that can break away if a horse or rider falls onto them.
Also, check that gates are secured, arena boundaries are clear, spectators are outside active riding space, and lighting and weather are appropriate for the session. Remove damaged equipment from use until it is repaired or replaced. These checks take little time and can prevent a small issue from becoming a serious hazard.
Budget, Store, and Maintain for the Long Term
A realistic budget includes more than standards and rails. Account for jump cups, replacement hardware, paint or sealant, freight, storage racks, carts, footing maintenance, and eventual replacements. For a competition-oriented setup, include the cost of presenting fences consistently and maintaining clear pathways for horses, riders, and helpers.
Store poles off the ground when possible, keep small hardware in labeled containers, and avoid careless stacking that can warp or damage equipment. Dry wet pieces before storage, inspect painted surfaces for wear, and review the full inventory at the start and end of each active season. Good maintenance protects the investment while keeping the ring ready for productive schooling.
Conclusion
A safe horse jump setup is built around purpose, not quantity. Start with a dependable footing, create room for balanced approaches and landings, choose adaptable equipment, and inspect each component regularly. With thoughtful planning and steady maintenance, even a small arena can become a flexible training space that supports horses and riders at many stages of development.
